Category Archives: General

Messed Up Apple Music Metadata

Kirk McElhearn wrote about the messed up state of Apple Music metadata, and he used the Ultimate Sinatra collection as his example:

When I first added the Ultimate Sinatra album to my library, it was a single album, but it changed after a while. I surmise that iTunes matched the tracks and found that many of them were on different albums. Just as iTunes often matches tracks from studio albums to “best of” albums, here, it’s matched some tracks to the album I downloaded, and other tracks to whatever iTunes found first. But, of course, iTunes shouldn’t match Apple Music tracks; it only matches your music, that you’ve ripped or downloaded, and added to your iTunes library.

I actually added this album to my iTunes library about two months ago. My process for importing music from CD is:

  1. Rip the CD to Apple Lossless format using XLD.
  2. Update the metadata of these files using MusicBrainz Picard.
  3. Import these files into my iTunes library.

Once I read Kirk’s article, after the panic subsided, I opened up iTunes to see what Apple Music might have done to the tags on my copy of this album. To my surprise, the metadata seems to have been unaltered since I imported it into iTunes:
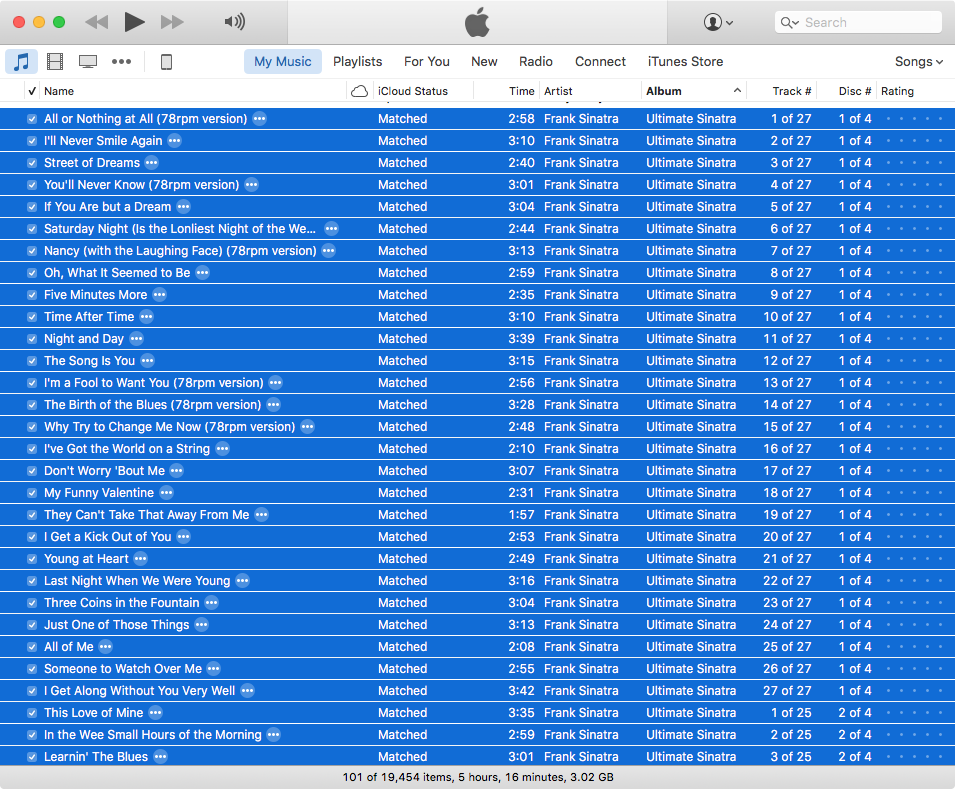
Frank Sinatra's *Ultimate Sinatra* in my iTunes library

It’s the unpredictability of Apple Music that most scares me. That Kirk and I can have such wildly varying experiences (with the same album!) does not bode well for the back-end of Apple Music. I haven’t done it yet, but every month I consider canceling my Apple Music subscription out of fear that it will destroy my music library.

If there was an easy way to use iTunes Match with my main library, and run Apple Music in a separate library, I would probably do that. Since they’ve merged the back-ends of those two features as iCloud Music Library, I don’t believe that’s possible. So I make regular backups, and I’m hoping I’ll still have a good backup around once I figure out which of my 19,454 songs have been corrupted by Apple Music.
YNAB and Day One - Hosting Private Data

Something is in the air in 2016: this weekend marked the second time this month that a product I’ve come to rely on has made dramatic changes to their data handling practices. This time it’s Day One, who have announced a major version update that will remove Dropbox and iCloud sync in favor of their home-brew Day One Sync backend. Before that it was YNAB, who have migrated from a local-data only solution to an entirely cloud-based system.

I’m not interested in putting either my personal financial data, or my personal journal, on unproven servers with uncertain access policies, and without two-factor authentication. Gabe and Jeff discuss this more completely on Episode 57 of Nerds on Draft — my thoughts very closely mirror Gabe’s.

I’ve entrusted this data with Dropbox, reluctantly, because the value of sync has been greater than my need for absolute privacy. While Dropbox has had breaches, the addition of two-factor authentication has provided me with additional peace of mind. Their brand also relies entirely on their reputation for security and reliability, and they have a reasonable track record. Neither YNAB nor Day One have earned my trust, and I don’t intend to follow them as they migrate.

I sent the following note off to Day One support just now:

Hello,

This doesn’t require any response, but I wanted to submit a response to your announcement of Day One 2. I’m a very, very happy customer of Day One, and I have been since shortly after your launch. I intend to buy Day One 2 when it comes out, because I want to continue to support you, but I have no intention of using v2 until you offer alternative sync methods.

I’m not interested in storing my private data on your servers. I don’t know exactly what is meant by ‘private-key encryption’, but I’m certainly not convinced it will address my concern. My journal is private, and I have no sense of the security of your backend.

I hope that you’ll reconsider and add either iCloud or Dropbox back into the application.

Thanks, Jeff

I seriously hope both services reconsider these decisions.


Update February 2, 2016:

Sven at Simplicity is Bliss has a great post on this as well. I particularly agree with this comment:

There is no 100% security and hopefully everyone knows this. Both Dropbox and iCloud have been compromised before and will be in the future. At the same time Apple and Dropbox have huge engineering and security teams. It is unlikely that Bloom, the makers of Day One, can defend and protect Day One Sync in a similar way in a worst case scenario.

I think that’s the crux of my feelings - I’d rather trust a larger corporation to have the proper security protocols in place. That doesn’t mean they’ll always do the right thing, just that they have greater resources to deploy to keep my data safe.

Picking a Camera

I’ve been thinking about buying a camera.

I had pretty much convinced myself that the Olympus OM-D E-M10 Mk II was the right camera to buy, until I stumbled on a $670 price for a new OM-D E-M1 body. Now I’m conflicted. The E-M10 Mk II is a brand-new design, while the E-M1 was announced in September of 2013, though it’s still actively receiving firmware updates (here’s a Youtube video explaining the new features). Also, a Mk II version of the E-M1 is expected imminently (though it will be well outside of my price range).

In the < $1000 price range, the OM-D E-M10 Mk II is regarded as the top pick by The Wirecutter, and is the ‘also consider’ choice of DPReview in their 2015 Roundup of $500-800 cameras1. The Wirecutter has picked the E-M1 as its runner-up for overall Best Mirrorless Camera, after the $1,700 (with kit lens) Fujifilm X-T1.

I’ve found it hard to find a direct comparison of the E-M10 Mk II against E-M1, since they’re usually regarded as existing at wildly different price points. This is my attempt to compare the two, but it’s actually tough to find modern data on the E-M1 as so much has been improved via firmware updates. Unless otherwise noted, this data has come from the DPReview reviews of the E-M10 Mk II and the E-M1.

OM-D E-M10 Mk II OM-D E-M1
Price2 $750 $870 ($670 + $199)
Sensor 16.1 MP Live MOS (Four Thirds)
Processor TruePIC VII
Image Stabilization 5-axis (4 stops) 5-axis (???)
Electronic Shutter Yes Yes (v4 firmware)
ISO Range 100-25600
Max Burst Rate 8.5fps 10fps
LCD Type Tilting
LCD size/resolution 3” / 1.04M-dot
EVF type/resolution 2.36M-dot OLED 2.36M-dot LCD(?)
EVF size (35mm equiv.) 0.62x 0.74x
AF targeting pad Yes No
Built-in flash Yes No
Video resolution 1080/60p/30p/24p 1080/30p/24p
4K time-lapse Yes Yes
Weather-sealing No Yes
Mic Jack No Yes
Battery life 320 shots 350 shots
Dimensions 120 x 83 x 47mm 130 x 94 x 63 mm
Weight (loaded) 390 g 497 g
Focus Contrast Detect Contrast + Phase Detect

I’m leaning heavily toward the E-M1, though I’m a little worried that the heavier and larger body may not be ideal - but the Phase-Detect Continuous Auto-Focus would be very welcome with our poorly-behaved dogs.

I haven’t settled on anything yet, but I’ll post when I do. These are some other links I’ve found useful:


  1. After the Sony a6000, which I’ve ruled out, mostly based on a lack of enthusiasm in my research. 

  2. Including the 14-42mm EZ Kit Lens, which is what I would be starting with. 

Bose at CES

It’s not often I get to write about what I do at work, but Bose put together a big event at CES this year. This video summaries the experience:

I was fortunate enough to have the opportunity to contribute to all of the technologies we exhibited, including the new NEAR technology:

In a demonstration of NEAR at CES, Bose showed how it could place navigation prompts where they made the most sense, and keep phone calls focused on the driver.

Of course, all of the projects were team efforts — I’m thrilled to have contributed to all of them, and to be able to share some of what I’ve been working on over the last five years.

Update May 6, 2016: Here’s a link to a Motor Trend article about the CES presentation, including NEAR.

Crashplan Out of Memory Error

For the last few weeks I’ve been receiving periodic emails from Crashplan telling me my iMac hasn’t been able to reach their servers. When I received the emails, I would check and find that the menu bar application was no longer running. I saw this two years ago when I first setup the iMac, but things had been running smoothly for a long time.

Crashplan has a great support article detailing this issue. Essentially, the Java engine can run out of memory while scanning files, resulting in a crash. You can confirm the behavior by checking the log files1 for the string “OutOfMemoryError”.

They recommend allocating 1 GB of or memory for every 1 TB of files, with a default setting of 1 GB. My iMac has a 3 TB internal drive, and a 2 TB included in the backup, so the default 1 GB allocation is definitely insufficient. The support article details the process of changing the memory allocation, which involves entering a command in the Crashplan console:

java mx 5120, restart

I set the memory to 5 GB to match the recommendation. While I was looking into the issue, I stumbled on this post, which describes where the memory allocation value is stored. It’s in a plist file located at:

/library/launchdaemons/com.crashplan.engine.plist

There’s a string value in the plist that will have the value Xmx1024m by default. This is the memory allocation, and after changing the value through the Crashplan console, I checked the plist to confirm the change had taken.

I expect I won’t see the issue again, until the app reverts to the default setting again.


  1. Located at /Library/Logs/CrashPlan in OS X. 

Recreating The ’80s Home Studio Experience

Sound on Sound published a great article on Recreating The ’80s Home Studio Experience that had me reminiscing. I came along later, but in the late-’90s we used a lot of similar tricks, and I would have loved to have had access to some of the tools they used in the article.

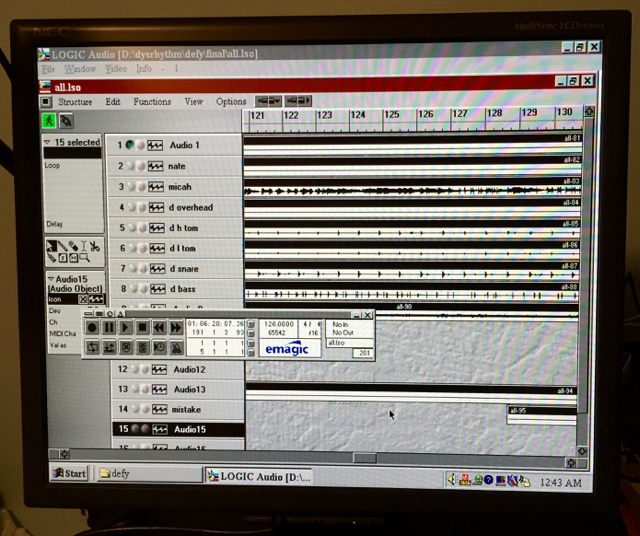
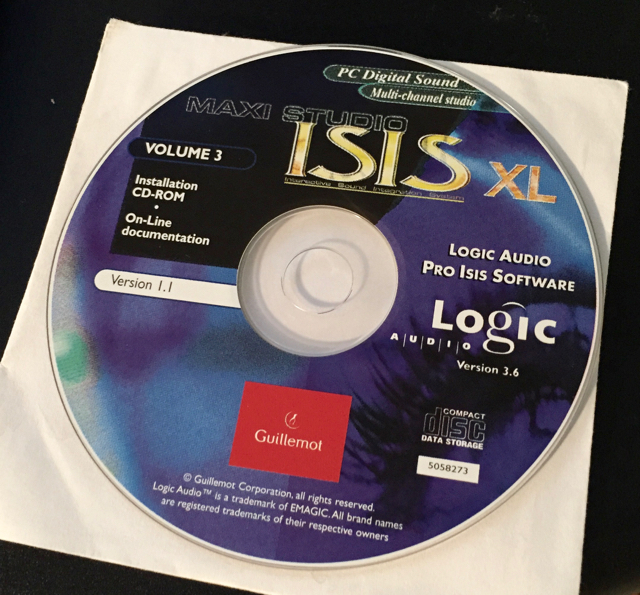
The first record I made with my band was recorded to EMagic Logic version 3.6, with six SM57 microphones directly driving the line inputs of the ISIS XL (we didn’t know about mic preamps!). We took DI feeds for the bass and used the speaker emulator outputs of a Marshall JMP-1 for guitar sounds. I think we ran our ‘mix’ through a BBE Sonic Maximizer, too, because someone told us we should. Every aspect of trying to make a record was a struggle, but it was that challenge that led me into the world of audio technology.

Logic Audio version 3.6

ISIS XL Installation CD

Move Song Start

I just got burned by Pro Tools, so I’m making a note of what happened and how to avoid it in the future.

We had an extensive session setup, with drums, bass, guitars, and synths, and many takes of each. The takes were stored on alternate playlists.

We decided we needed an extra two bars at the beginning of the song, so I used the Time Operations -> Move Song Start tool to add silence at the beginning of the song. I didn’t realize it at the time, but because all of the tracks were in Waveform View, only the currently selected playlist was shifted. A few days later I opened the session and realized that the alternate playlists weren’t aligned.

The trick is to make sure the tracks are in Playlist View. In that mode, Move Song Start shifts the start times of all playlists. I made a video showing the different behaviors:

This honestly feels like a design flaw — that the behavior of a modal tool is changed by the state of tracks that may not be visible at all. I really hope they change this in a future revision.

Mazda Firmware Update

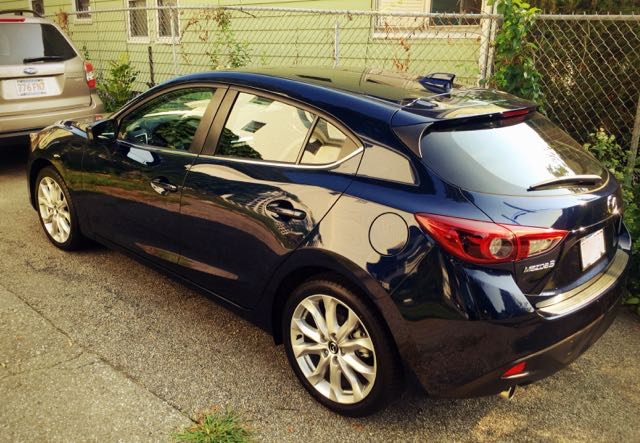
After driving my last car for twelve years, I finally made the decision to upgrade this past summer. I bought a well-reviewed and efficient Mazda3.

Mazda3 Hatchback

When I first picked up the car, I could not figure out how to get navigation prompts to show up in the Active Driving Display (the HUD). I knew they were supposed to show up - this video shows the display in use, and explicitly calls out ‘Turn-by-Turn Directions’.

I found a post in the Mazda3Revolution forum that confirmed this was a software bug in firmware version 55.00.750B:

FYI, just got off the phone with Mazda Customer Care and they are aware that version 55 removed the driving directions from the H.U.D. and are working on fixing it. Also, I asked if I had to pay for any future updates or are they under warranty. I was told they are covered under warranty.

A later post confirmed that version 55.00.753A, released on August 13, 2015, fixed the issue. There’s a post in the forum that someone is keeping up to date with links to the most firmware versions, and great instructions for doing the upgrade yourself12:

1) Format USB 2.0 Flash Drive as FAT32 2-16GB, CMU Does NOT support USB 3.0. 2) Copy the 2 update files (for one Version) over using a WINDOWS computer (only the failsafe.up and reinstall.up). 3) Remove the SD Card from the slot. 4) Set the car into ‘accessory mode’ amber light ONLY (ONE push of the push start button, DO NOT start the ignition). 5) Plug USB Flash Drive into the USB slot of the car. 6) Press the music, favourites, and mute buttons in your car all at the same time and hold for 2 to 5sec. ONLY USE ”TOUCH SCREEN” FOR NEXT UPDATE INPUTS - DO NOT USE DIAL KNOB. 7) Input code 3 to test for DTC’s, enter, then clear, IF there’s any DTCs listed, Input code 2, enter, then clear to remove all DTC’s. 8) Input code 99, enter, to start the system update process. 9) Select SEARCH for the System Update Packages. 10) Click on ‘Return Icon’ on Commander switch ONLY if you do not see the list of ‘Available Software Update Packages’ screen. 11) Select and INSTALL, install the failsafe.up, PRESS “OK” once package is installed successfully. 12) Press and release clutch pedal (MT) or brake pedal (Auto) BEFORE 25 mins on/off limit to reset the ACC timer to keep Amber on. 13) Press the music, favourites, and mute buttons in your car all at the same time and hold for 2 to 5sec. ONLY USE ”TOUCH SCREEN” FOR NEXT UPDATE INPUTS - DO NOT USE DIAL KNOB. 14) Enter code 99, enter, to start the update process. 15) Select SEARCH for System Update Packages. 16) Select and INSTALL, Install the reinstall.up, may take some time, possible blank or hard to read screens are normal. 17) Reinstall process can take some time for Progress Bar to finalise from 98% to 100%. 18) Confirm any confirmation screens. 19) Turn Ignition OFF, wait, and then ACC ON (Amber) to confirm changes. 20) Turn Ignition OFF, wait, and remove USB Flash Drive. 21) Delete “Mazda” on any phones Bluetooth BEFORE any phone re-pair attempts. 22) Insert SD Card. 23) Reset Radio preferences, etc.

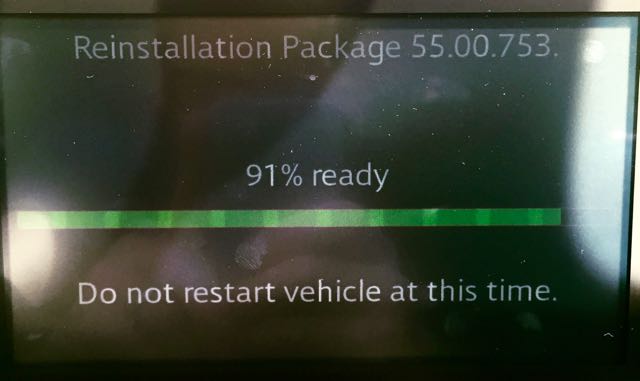
Based on all of the research I did, I felt confident attempting to do this myself. It worked well — I would just caution anyone else to follow the instructions exactly, and to be patient. Some of these steps require a fair amount of waiting. The entire process took about 30 minutes for me — much faster than scheduling some time with the dealer.

Reinstallation Package 55.00.753: 91% ready


  1. There are alternative instructions here and more details about the infotainment system here

  2. Reproduced here in case they go away at some point in the future. 

Inside Abbey Road

While I was in London this summer, I saw a massive advertisement for a new Google project, Inside Abbey Road. The sign was suspended above the construction around Old Street Station, and it caught my eye.

Sign above Old Street Station labeled "Google presents Inside Abbey Road"

If you’re interested in recording, it’s worth following the link. I think it’s best described as an annotated version of Google Streetview, inside one of the most famous studios in the world. Some of the details are familiar, but some aren’t. I hadn’t ever heard this anecdote about the Mrs. Mills Piano:

Built at the turn of the century, EMI picked up the piano in 1953 for a pretty reasonable £404 and immediately started to adjust it to their needs. The hammers were lacquered to create a brighter sound, and it was always kept slightly, though deliberately, out of tune. It soon became known as the ‘Mrs Mills Piano’ after the unlikely superstar Gladys Mills used it create jaunty instrumentals in the pre-rock and roll era.

But it wasn’t just Gladys who got to tickle these particular ivories. This Studio Two legend appears on many famous tracks, including some of The Beatles’ finest. It’s distinctive sound can be heard on Penny Lane, With A Little Help From My Friends, and Lady Madonna, as well as a multitude of others. And it continues to be used today. Proof that the studio is anything but ageist, providing equal opportunity for any piece of equipment, no matter how old it is!

Switching to OPVault from Agile Keychain

Dale Myers wrote a post about a potential insecurity in 1Password’s data format. The team at 1Password wrote a great response that discusses the design decisions that Dale was critical of.

The bottom line is that, in their older .agilekeychain data format, the metadata for your passwords — titles and URLs — is not encrypted. This data format was designed in the era of the iPhone 3G, when iOS devices had a lot less processing power, and this was viewed as a necessary trade-off for mobile devices.

1Password’s post points out that many vaults created since 2012 are using their newer .OPVault data format, which encrypts all of the metadata. Since I sync via Dropbox, my vault is still in the old .agilekeychain format.

Migrating to OPVault

The documentation for 1Password is great, and migrating to the .OPVault format is well explained. For the time being, I’m still keeping my vault synced via Dropbox, though I may eventually migrate to iCloud.

The process was:

  1. Backup your data.
  2. Quit 1Password.
  3. Change the default vault format with this command in the terminal: defaults write 2BUA8C4S2C.com.agilebits.onepassword-osx-helper useOPVaultFormatByDefault true1
  4. Disable the sync via Dropbox (which deletes the existing .agilekeychain data).
  5. Reenable sync via Dropbox (this will create data in the new .OPVault format).2
  6. Disable and reenable syncing on all other devices.

This last step was actually the most complicated. On iOS, I disabled sync (Settings -> Sync -> Sync Service -> Disable Sync), wiped out the local data cache (Settings -> Advanced -> Erase Data and Settings), and then turned sync back on. My data repopulated very quickly — I believe speed is one of the benefits of the new format. I’m not sure if the wiping step was necessary, but I was more comfortable syncing one-way than relying on a proper merge of the data.

On my laptop I used the same process. The process of wiping the local data is a lot more involved, and I couldn’t figure out a way to sync the local data with the Dropbox data otherwise.

The End of 1PasswordAnywhere

The benefit of this hassle is additional security. Now, all of the metadata in my vault is encrypted.

The downside is that the handy 1PasswordAnywhere tool does not work with the new .OPVault format — this looks like the end of the road for it. AgileBits describes 1PasswordAnywhere as:

1PasswordAnywhere is a local, web browser-based interface for your vault. It was built into our Agile Keychain format years ago, and hasn’t seen many updates in recent years. These days, it has been mostly replaced by platform-native versions of 1Password.

The benefit of this was that, armed with my Dropbox password and 1Password Master Password, you could view my login information without having the native application. This was a key enabler of the original 1Password Emergency Kit. The newer version 3 has dropped any references to 1PasswordAnywhere, in keeping up with the times.

Initially, the loss of this functionality seemed like a major step backwards. In reality, I doubt anyone with a copy of my emergency kit would have made use of 1PasswordAnywhere, anyway. My wife has a copy of 1Password on her laptop, so she would be able to access the data regardless. At this point, I’m taking the added security of .OPVault over the inconvenience of losing 1PasswordAnywhere.


  1. The command is slightly different if you’re using the direct purchase version of 1Password, so refer to their support documentation

  2. As a side benefit, I finally moved the 1Password folder into ~/Dropbox/Apps/, so it’s no longer cluttering up my root folder.